This article introduces the procedures and operations of implementing A/B Testing on Web and HTML5 pages via EyeOfCloud’s A/B Testing Tool.
SDK Installation
Sign in to EyeOfCloud system (https://app.eyeofcloud.com), enter Dashboard, select “Optimization” tab from menu, then click “SDK Download and Installation”.

Copy the EyeOfCloud JavaScript SDK code, paste it before the </head> tag of your website’s code. Please ensure the code is embedded to all webpages implementing A/B Testing.

Create Experiment
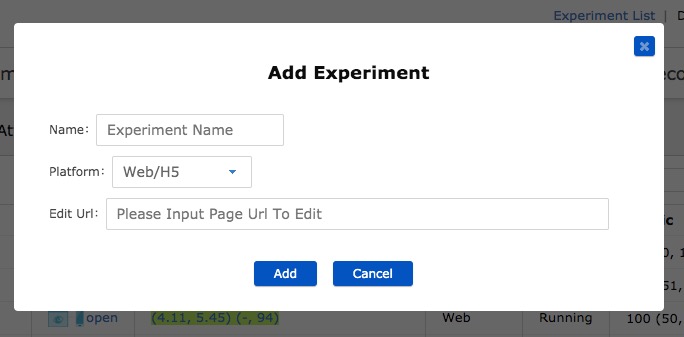
return back to Dashboard, select “Optimization”, click on “Add Experiment”.

Select Web/H5 as your platform, enter the name and URL for your experiment, then click “Add” to complete the creation.
Edit Variation
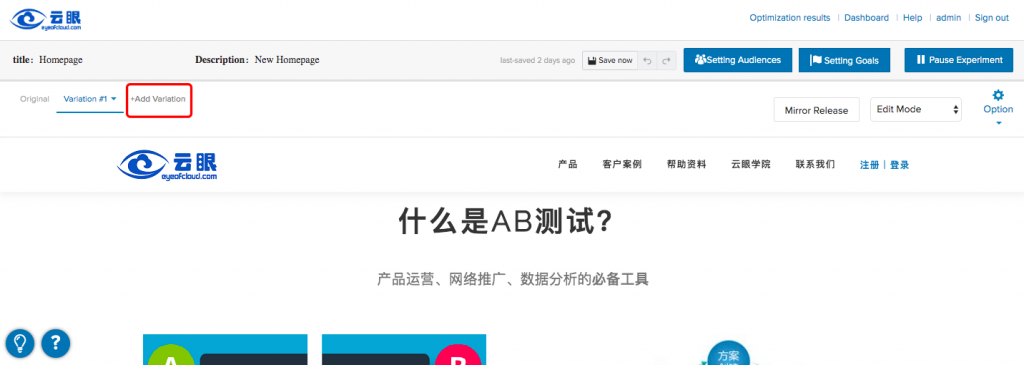
Click “edit” on Dashboard, enter the editor. Click “Add Variation” to create a new variation of your experiment.
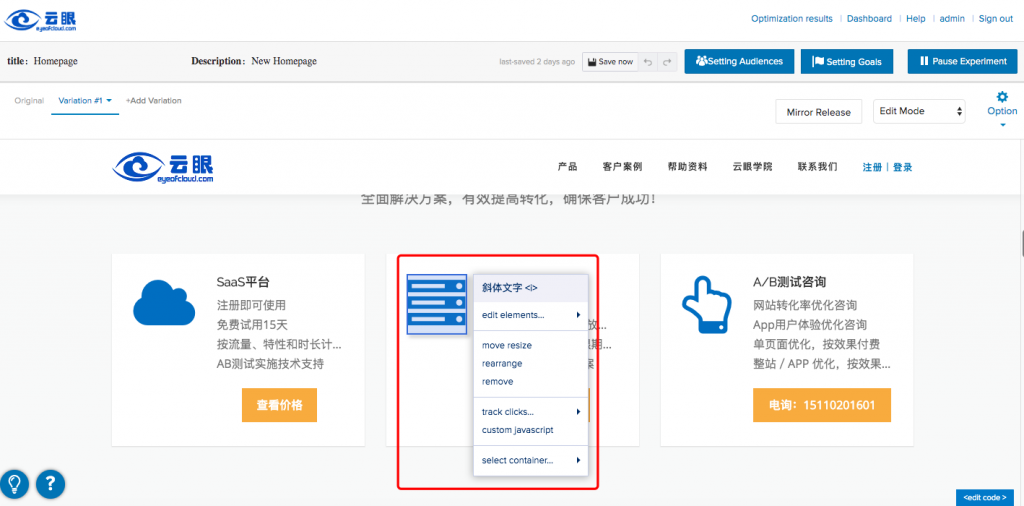
You can edit your page via the visual editor. Left click on any element will pop up a list of optional functions to operate accordingly.
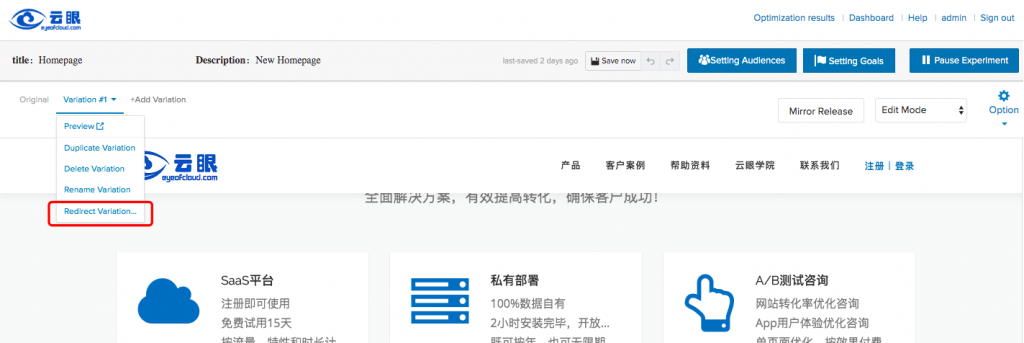
You can also redirect your variation to a new URL via the Variation Redirect Function. Click on the variation, select “Redirect Variation” from the dropdown box.
URL Targeting
Click on “Option”, select “URL Targeting”. You will be able to set URL rules to run the experiment.
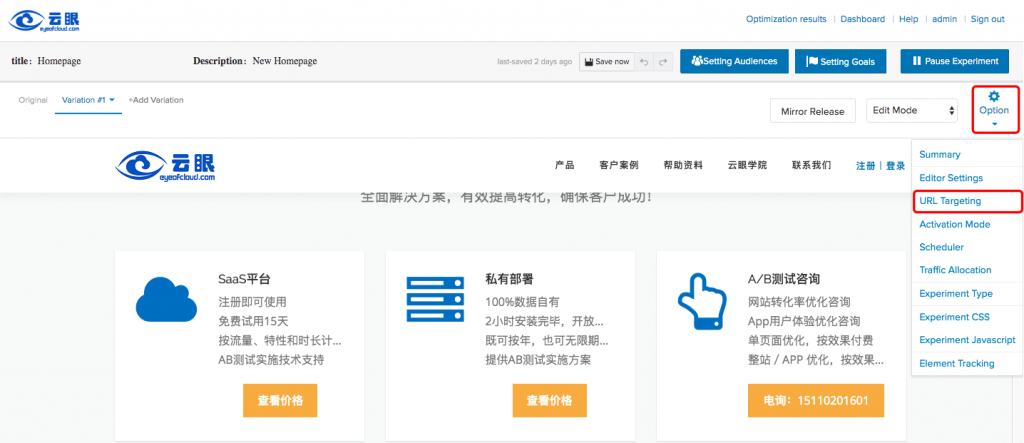
Select the matching rules needed and fill in the URL. You can validate whether the experiment will run on the expected URL in “URL Match Validator” below.
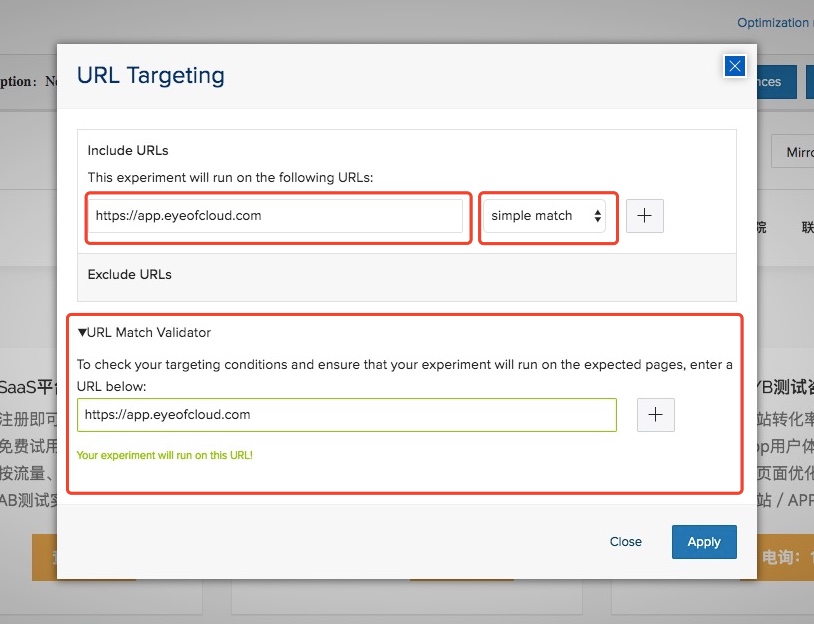
The methods for URL matching are as follow:
- Simple match: default type, often used for single page optimization. The differences in parameter query, hash parameter, protocols(HTTP://, HTTPS://) and WWW will not have impact in executing the experiment. Meanwhile, changes in the submenu, subdomain and extensions (e.g. html) will affect the execution of the experiment.
- Exact match: only applies to exact matching URL. The differences in protocols(HTTP://, HTTPS://) and WWW will not have an impact in executing the experiment. Meanwhile changes in the parameter query, Hash parameter, submenu, subdomain and extensions (e.g. html) will make the experiment inoperable.
- Sub-string match: All URLs containing the string will run the experiment.
- Regex match: Higher technical level, used to locate URL structures that are uneasily captured by other matching types. Regular expressions are case sensitive, while the other three are case insensitive.
Setting Goals
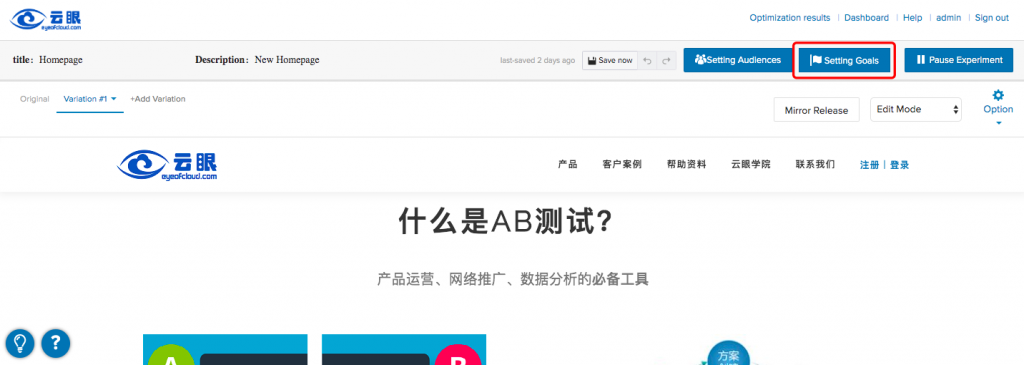
Click the “Setting Goals” button to open the settings panel. Target is the indicator we want to optimize, the standard used to measure the test results, the common registration rate, click rate and so on.
Click “Create a new goal” and start creating the target.
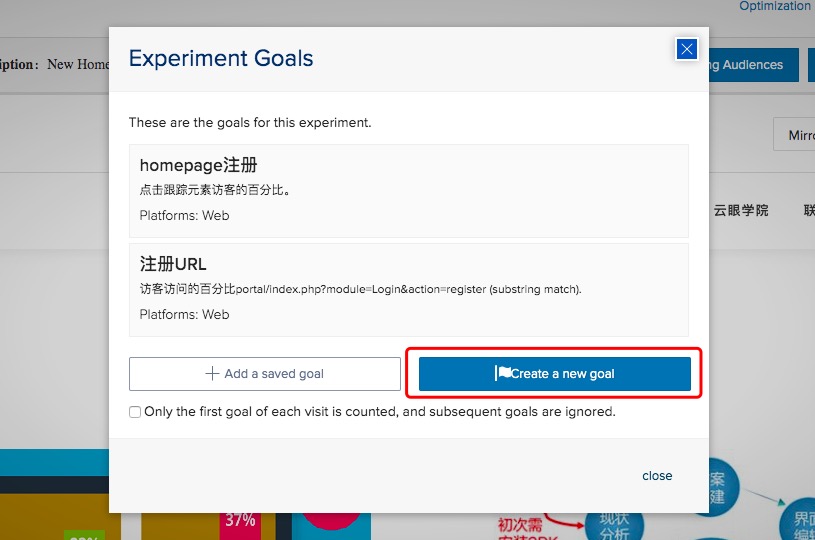
Select the Goal type, fill in the name and the corresponding value. There are three types of goals: page browsing, mouse clicks, and custom events. The page browsing goal is triggered whenever the user views the corresponding webpage, and the mouse click goal is triggered when the specific target is clicked. The custom event needs to be triggered by JavaScript code. When creating a mouse click goal, you can click the expand button at the bottom of the interface to select the target you want to click on the web page, and click the selected target again to cancel.
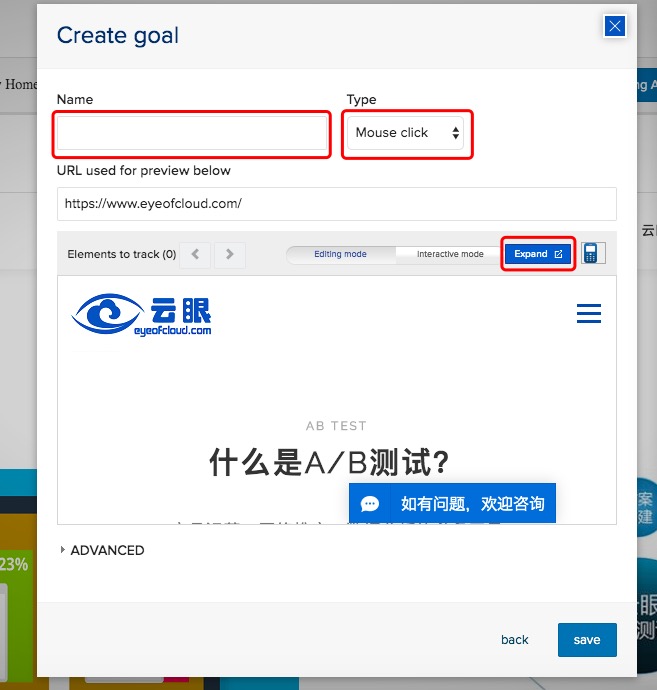
Save and complete the setting of your goal.
Setting Audiences
Click the “Setting Audiences” button to open the settings panel. The audience indicates the type of visitor group that will participate in the experiment, and visitors who do not meet the audience criteria will not participate in the experiment.
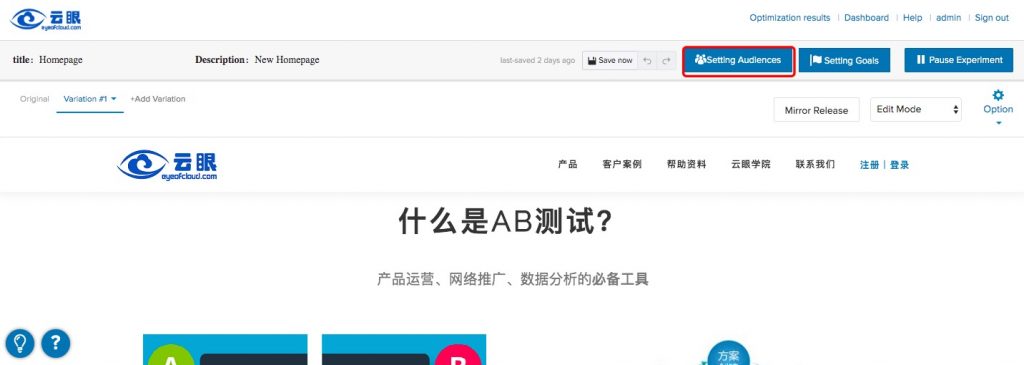
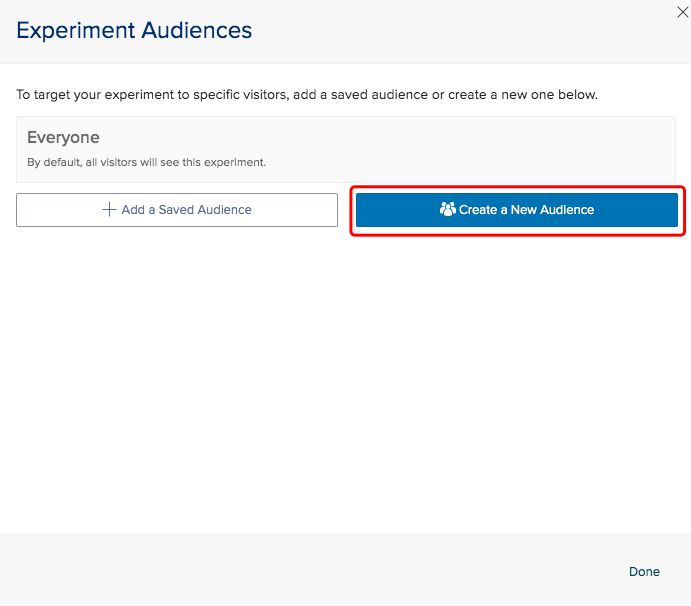
Click “Create a New Audience” button to access the interface.
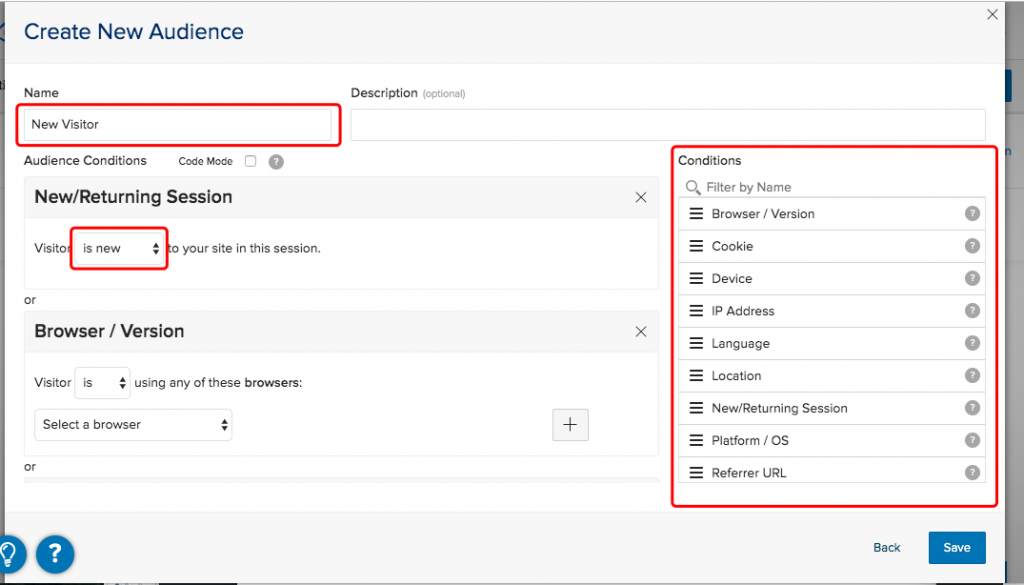
Fill in the audience name, drag the audience criteria from the right to the condition panel on the left, and fill in the conditional values. Audiences can be formed from multiple conditions to achieve a more complex audience type. Save and complete the creation of your audience.
Traffic Allocation
Click “Option”, select “Traffic Allocation”.
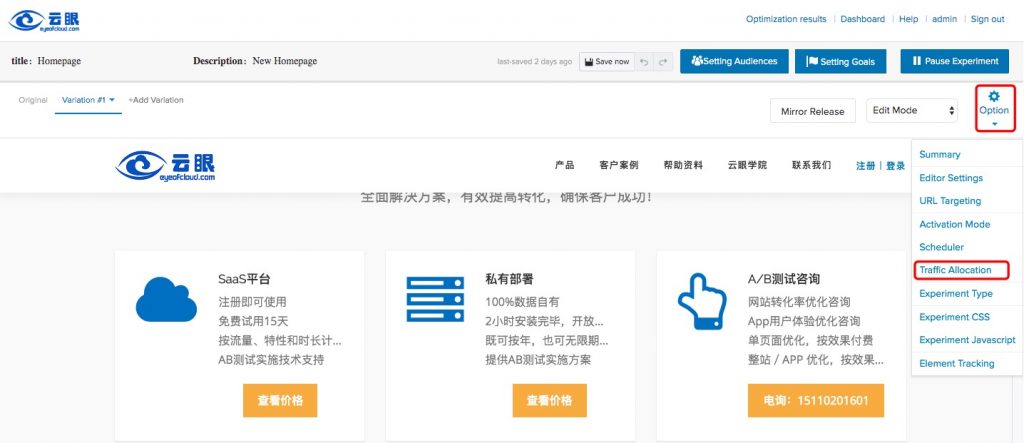
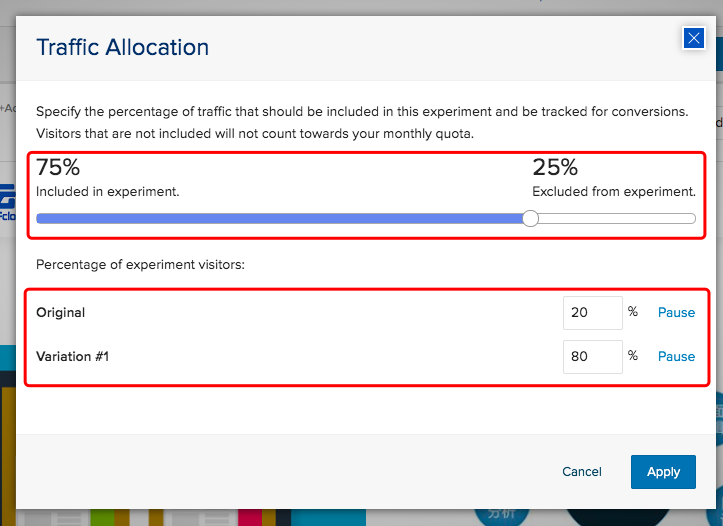
Drag the bar with mouse to assign the total traffic. The total traffic determines how much of the total network traffic will participate in the experiment. Modify the traffic distribution ratio for each version at the version traffic below.
Preview
Before launching the variation, you can view the webpage through the preview function to ensure that the experiment does not cause problems. Click on a variation to open the menu and select Preview. In the preview interface, we can set the visitors’ properties to test the audience, check whether the target is normal, and whether the interface is modified properly. (The preview function needs to be embedded in the SDK to work properly)

Start Optimization
Save and click on the “Run Experiment” button to start the optimization.

View Results
After running the experiments for a while, return to the EyeOfCloud Dashboard, select “Optimization”, and click the optimization result of the corresponding optimization scheme. For details, please refer to how to analyze the A/B test results (TBT).

In the results page, we mainly look at the improved values and statistical significance of each optimized version. If the improvement is positive and the statistical significance is more than 95%, we can infer that this modification is valid. Select the most improved version as the winning variation.

